Poolish Pizza Dough for Your Outdoor Pizza Oven

If you own a Gozney, an Ooni, or any outdoor pizza oven, the dough is where you win or lose. The oven can hit 900°F. The sauce can be perfect. The toppings can be beautiful. But if the dough is bland, dense, or fights you when you try to stretch it — none of that matters.
This recipe solves all three problems with one technique: a poolish pre-ferment. You spend 5 minutes the night before mixing equal parts flour and water with a tiny amount of yeast. That mixture ferments overnight, developing deep flavor, building gluten structure, and creating the gas that gives you a light, airy crust with those coveted air bubbles in the cornicione. The next day, you mix in the remaining flour and salt, knead briefly, and let it rise. That's it.
This is the same dough from our Classic Pepperoni Pizza recipe, broken out into its own dedicated post because it deserves a deep dive — and because great pizza dough is a skill that changes every pizza you'll ever make.
What Is a Poolish (And Why Does It Matter)?
A poolish is one of the simplest types of pre-ferment — a small batch of flour, water, and yeast that ferments for hours before being added to the final dough. The term comes from French baking (it's sometimes called a "Polish sponge"), and it's been used by European bakers for centuries to improve both flavor and texture in breads and pizza.
The concept is straightforward: by giving the yeast a long head start in a wet, warm environment, you get fermentation benefits that a direct (same-day) dough simply cannot achieve, no matter how long you let it rise.
Here's what the poolish actually does for your pizza:
Flavor. During those 12–16 hours of fermentation, the yeast and natural enzymes break down starches in the flour into sugars, and those sugars develop into complex flavor compounds. The result is a crust that tastes slightly tangy, yeasty, and almost nutty — with a depth that screams "good pizzeria" instead of "homemade on a Tuesday." A direct dough made the same day will always taste flat by comparison.
Texture. The long fermentation allows gluten to develop slowly and naturally, without aggressive kneading. This produces a dough that's incredibly extensible — it stretches easily without snapping back or tearing. When baked, the crust is light and airy with an open, irregular crumb and those big charred bubbles (called leopard spotting) that only happen with a well-fermented dough.
Digestibility. Extended fermentation breaks down more of the proteins and complex carbohydrates in the flour, which can make the finished crust easier to digest. Many people who report feeling bloated after eating pizza find that long-fermented doughs don't cause the same issues.
Consistency. Because the poolish handles most of the heavy lifting in terms of flavor and gluten development, the final dough is more forgiving. It requires less kneading, it's easier to shape, and it performs reliably even if your technique isn't perfect. It's a great recipe for beginners and experienced pizza makers alike.
Poolish vs. Other Dough Methods
There are several ways to make pizza dough. Here's how poolish stacks up against the alternatives so you can understand why we reach for it every time:
Direct dough (same-day) is the simplest method — you mix everything at once, let it rise a few hours, and bake. It's fast, but the flavor is one-dimensional and the crust tends to be denser. Fine for a weeknight in a home oven, but it won't showcase what your outdoor pizza oven can do.
Cold-fermented direct dough (24–72 hrs) improves on direct dough by refrigerating the mixed dough for 1–3 days. The cold slows fermentation and does develop more flavor over time. However, the flavor profile is different from poolish — it leans more sour — and the dough can be stiffer and harder to stretch after days in the fridge.
Biga is another Italian pre-ferment, but it's much drier (roughly 50–60% hydration vs. the poolish's 100%). Biga produces a slightly different flavor — more subtle, less tangy — and takes longer to ferment (up to 24–48 hours). It's traditional in ciabatta and focaccia. Both biga and poolish make excellent pizza; poolish is simply faster to prepare and easier to incorporate.
Sourdough uses wild yeast from a maintained starter instead of commercial yeast. It produces incredible flavor and texture, but requires an active starter that needs regular feeding and management. If you already maintain a sourdough starter, by all means use it for pizza. If you don't, poolish gives you 80% of the flavor benefit with none of the ongoing maintenance.
Poolish is the "best of both worlds" for most home pizza makers — significantly better flavor and texture than direct dough, with almost no extra effort. Start the poolish before bed, make the dough in the morning, and you're baking pizza by evening.
The Timeline: Plan Your Pizza Day
This recipe requires some planning, but the actual hands-on time is minimal. Here's what a typical pizza day looks like:
Total elapsed time is around 20–24 hours, but you're only actively working for about 25 minutes. The rest is just the dough doing its thing.
Choosing Your Flour
Flour choice matters more in pizza dough than almost any other recipe because the dough is so simple — flour, water, salt, yeast. There's nowhere to hide.
Tipo 00 flour is the ideal choice for outdoor pizza ovens. It's finely milled Italian flour with a protein content (typically 12–13%) that creates a dough with excellent extensibility and a tender, slightly chewy crumb. At 800°F+, 00 flour bakes into a crust that's crisp on the outside and soft inside with beautiful leopard spotting. Caputo Pizzeria (blue bag) is the gold standard and widely available online and in specialty grocery stores.
Bread flour (12–14% protein) is the closest substitute. It produces a slightly chewier, more structured crust — think more New York style than Neapolitan. It works well, especially in ovens running at lower temperatures (500–700°F) like a Big Green Egg or pellet grill setup.
All-purpose flour (10–12% protein) will work in a pinch, but the lower protein means less gluten development, which means a dough that's harder to stretch thin without tearing and a crust that's less airy. If all-purpose is all you have, consider adding an extra 15–20 minutes of rest time to let the gluten develop further.
Weigh your flour. A cup of flour can vary by 30g or more depending on how you scoop it. This recipe uses gram measurements for a reason — a $15 kitchen scale is the single best investment you can make for consistent pizza dough.

Poolish Pizza Dough
Overnight pre-ferment — 4 dough balls for 10–12 inch pizzas
📋 Ingredients
Poolish (Night Before)
- 200g Tipo 00 flour (Caputo Pizzeria recommended)
- 200g water, room temperature
- 1g instant dry yeast (about ¼ teaspoon)
- 5g honey (about 1 teaspoon)
Final Dough
- 300g Tipo 00 flour
- 75g water, room temperature
- 10g fine sea salt
- 5g extra virgin olive oil
- All of the poolish from above
👨🍳 Instructions
In a medium food-safe container (a large mason jar, deli container, or mixing bowl all work), combine 200g Tipo 00 flour, 200g room-temperature water, 1g instant dry yeast, and 5g honey.
Stir with a fork or spatula until the mixture is smooth and homogeneous — no dry flour streaks remaining. The consistency should look like thick pancake batter.
Cover loosely (not airtight — the fermentation produces CO₂ that needs to escape) and leave at room temperature for 1 hour. You'll see it start to bubble slightly. Transfer to the refrigerator and cold-ferment for 12–16 hours.
The poolish is ready when the surface is domed and covered with small bubbles — it should look active and almost alive. If it has collapsed and started sinking back into itself, it's over-fermented. The flavor will still be fine, but leavening power is reduced. For best results, aim for the "just domed" stage. Start it around 8–9 PM and use it between 10 AM and noon the next day.
Remove the poolish from the refrigerator 30 minutes before you plan to mix. Let it come to room temperature — cold poolish incorporated into the dough will slow your rise significantly.
In a large mixing bowl, add the entire poolish and 75g room-temperature water. Stir vigorously to loosen and dissolve the poolish into the water. It should look like a shaggy, bubbly slurry.
In a separate bowl, whisk together 300g Tipo 00 flour and 10g fine sea salt. Gradually add the flour-salt mixture to the poolish-water, stirring with a fork or your hand until a rough, shaggy dough forms and no dry flour remains. Don't worry about smoothness yet — it will look messy.
Turn the dough onto a clean, unfloured work surface. Knead for 4–5 minutes using a push-fold-rotate motion. The dough will be sticky at first — resist adding extra flour. A bench scraper is your best friend here for gathering the dough back together.
After 4–5 minutes, flatten the dough slightly and drizzle 5g olive oil over the surface. Continue kneading for another 4–5 minutes, working the oil into the dough until it becomes smooth, elastic, and slightly tacky but no longer sticking to your hands or the counter.
The windowpane test: Pull a small piece of dough and gently stretch it between your fingers. If you can stretch it thin enough to see light through it without it tearing, the gluten is well-developed and you're done kneading. If it tears immediately, knead for another 2–3 minutes.
If using a stand mixer, combine the poolish-water and flour-salt in the bowl. Mix on speed 1 with the dough hook for 4–5 minutes. Add olive oil and increase to speed 2 for 3–4 minutes until the dough is smooth and pulls cleanly from the bowl sides. Don't over-mix — that makes the dough tough and overworked.
Shape the dough into a smooth ball by tucking the edges underneath. Place seam-side down in a lightly oiled bowl. Cover with a damp kitchen towel or plastic wrap.
After 15 minutes, uncover and give the dough a quick fold: pull one side up and over the center, then repeat from the other three sides. This strengthens the gluten network. Re-cover.
Let the dough bulk ferment at room temperature for 2–3 hours until it has roughly doubled in size. The ideal ambient temperature is 72–78°F. If your kitchen is cooler, it will take longer — you can place the bowl in your oven with just the light on for gentle warmth.
Lightly flour your work surface. Gently turn the dough out — try not to deflate it aggressively. Using a bench scraper or knife, divide into 4 equal pieces (approximately 195g each if you have a scale).
Shape each ball: Working one piece at a time, pull the edges toward the center and pinch to seal, then flip seam-side down. Cup your hands around the ball and drag it gently toward you on the unfloured counter — the friction helps create surface tension and a tight, smooth top.
Place the balls on a lightly oiled sheet tray (spaced apart) or in individual proofing containers. Cover with plastic wrap or a damp towel. Let proof at room temperature for 1–2 hours. The balls should visibly puff and feel soft, pillowy, and slightly jiggly when you nudge the container.

Preheat your outdoor pizza oven to 800–850°F (425–450°C). Let the stone floor soak for at least 20 minutes after reaching temperature.
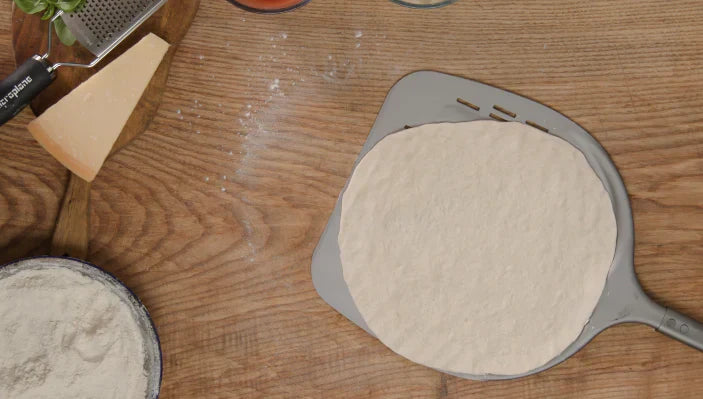
Stretch: Generously dust a work area with a 50/50 mix of semolina and 00 flour. Place a dough ball on the flour and press from the center outward with your fingertips, leaving a ½-inch rim untouched for the cornicione. Lift the dough and let gravity help stretch it, rotating as you go, until it reaches 10–12 inches.
Top and launch: Transfer to a floured peel, add your toppings (less is more), perform the shuffle test (the pizza should slide freely), and launch into the oven. Bake 60–90 seconds, rotating every 20–30 seconds with a turning peel.
For lower-temperature ovens (Big Green Egg, pellet grill at 500–700°F), stretch slightly thinner and expect a 3–5 minute bake. The dough performs beautifully across the full temperature range.
Storage & Make-Ahead Options
Same-day use is ideal — the dough is at its peak flavor and performance after the full poolish ferment + bulk rise + proof cycle described above.
Refrigerate the dough balls (up to 3 days). After dividing and shaping into balls, place them in lightly oiled individual containers, cover tightly, and refrigerate. The flavor will continue to develop and deepen. Remove from the fridge 60–90 minutes before you plan to stretch, allowing them to come fully to room temperature — cold dough is stiff and will tear.
Freeze the dough balls (up to 3 months). Wrap each ball tightly in plastic wrap, then place in a freezer bag. To use, move to the fridge the night before to thaw, then bring to room temperature for 60–90 minutes before stretching. Frozen-and-thawed dough won't be quite as airy as fresh, but it's still far better than any store-bought alternative.
Freeze the poolish? Not recommended. The poolish's leavening power declines quickly once it peaks, and freezing kills the active fermentation. It's so fast to make (5 minutes) that it's always better to mix a fresh one.
Troubleshooting
Dough won't stretch / keeps springing back. The gluten is too tight. Let the dough ball rest for another 15–20 minutes, covered, then try again. Under-proofed dough is the most common cause — give it more time.
Dough tears when stretching. Either it's under-kneaded (gluten not developed enough) or it's cold from the fridge. Make sure the dough passes the windowpane test after kneading, and always let refrigerated dough come to full room temperature before stretching.
Dough sticks to the peel. You didn't use enough flour/semolina on the peel, or the topped pizza sat on the peel too long. Work fast once the dough is on the peel — top and launch within 30–45 seconds. The shuffle test before launching is non-negotiable.
Crust is dense and not airy. Under-fermented. Either the poolish wasn't ready (not bubbly/domed enough), the bulk ferment was too short, or the room was too cold. Give the dough more time, or find a warmer spot in your kitchen.
Crust is flat with no rise in the cornicione. You pressed too hard on the outer rim when stretching. The rim should be untouched — all the gas trapped in those outer bubbles is what creates the puffy, charred cornicione. Press only from the center outward, stopping a half inch from the edge.
Frequently Asked Questions
What is a poolish?
A poolish is a pre-ferment made with equal parts flour and water (by weight) plus a small amount of commercial yeast. It ferments for 12–16 hours before being incorporated into the final dough. The long fermentation develops complex flavors, improves dough extensibility, creates a lighter crumb, and can make the finished crust more digestible. It's the technique behind many of the world's best pizzerias and artisan bakeries.
Can I use bread flour or all-purpose instead of 00?
Yes. Bread flour (12–14% protein) is the closest substitute and produces a chewier, more structured crust — great for New York style. All-purpose (10–12% protein) will work but gives a less extensible dough and denser crumb. For outdoor pizza ovens at 800°F+, 00 flour is ideal because it's calibrated for high-heat baking. Caputo Pizzeria (blue bag) is the most widely recommended.
Can I make this without a poolish? What's a same-day option?
You can mix all the ingredients at once (500g flour, 275g water, 10g salt, 3g yeast, 5g oil) and let the dough rise 4–6 hours at room temperature. It will work — but the flavor will be noticeably less complex and the crust won't have the same open, airy structure. The poolish genuinely adds 5 minutes of effort for dramatically better results.
How do I scale this recipe up or down?
The poolish should always be roughly ⅓ to ½ of your total flour weight. For this recipe, the poolish uses 200g of the total 500g flour (40%). To make 2 pizzas instead of 4, simply halve everything. To make 6, multiply by 1.5. Each dough ball should weigh approximately 195–200g for a 10–12 inch pizza, or 250–275g for a 14–16 inch pizza.
What temperature oven does this work in?
This dough is versatile across a wide range. At 800–850°F (Gozney, Ooni), you'll get a 60–90 second bake with leopard spotting and a puffy cornicione. At 500–700°F (Big Green Egg, pellet grill with pizza stone), expect a 3–5 minute bake with a crisper, more structured crust. Even at 450–500°F in a standard home oven on a preheated pizza steel, this dough makes excellent pizza — it just takes 7–10 minutes and won't achieve the same char.
My kitchen is cold — will the dough still rise?
Yes, it will just take longer. Below 68°F, fermentation slows significantly. Place the covered bowl in your oven with just the interior light on (this typically creates a 75–80°F environment), or near a warm appliance. You can also use slightly warmer water (80–85°F) when mixing the dough to give it a head start.
Can I use this dough for calzones, garlic knots, or focaccia?
Absolutely. This dough is incredibly versatile. For calzones, stretch a ball into an oval, fill one side, fold and crimp. For garlic knots, divide a ball into 6–8 small pieces, roll into ropes, and tie. For focaccia, combine all 4 balls into an oiled sheet pan and dimple with your fingers. The poolish gives all of these the same flavor and texture advantage it gives pizza.
📄 Download the Printable Recipe Card
Ingredients, timeline, all six phases, and troubleshooting — on one clean printable page.
⬇ Download PDF Recipe Card